When creating unordered lists (i.e. the ones with bullets and not numbers or letters) in HTML, you can use the list-image CSS property to use an image to replace the default bullets HTML supports.
That’s cool. But, if you are mindful of front-end optimization and decide to use CSS sprites throughout your site to reduce HTTP requests, the list-image CSS property falls short, because it is intended to use only one perfect, well-tailored bullet image for each bullet style you define. So, if you have ten different types of lists with different image bullets, you will need as many or more separate images to customize your lists. And that is NOT cool.
So, how do you use CSS sprites to create custom bullets?
Example
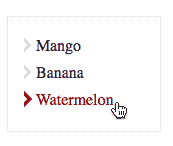
First, here is the demo of the bulleted list with custom bullets made using CSS Sprites we’ll be developing in this example. A few things to notice:
- The bullets are made of custom images contained in a CSS sprite.
- The bullets change on hover from gray to red, just like each link does (something not accomplished by default when only using the a:hover CSS property).
Now, let’s get to it.
What you need:
The HTML
This is the basic HTML we’ll use for this example, which creates a list of links to awesome tropical flavors:
<ul id="my-list">
	<li><a href="#">Mango</a></li>
	<li><a href="#">Banana</a></li>
	<li><a href="#">Watermelon</a></li>
</ul>
The CSS
This is the initial CSS we’ll use in this example. We’ll develop it more as we go along:
#my-list{
	width: 120px;
	padding: 16px;
	border: 1px dotted #CCC;
}

#my-list a{
	display:block;
	padding: 4px 0;
	color:#333;
	text-decoration:none;
}

#my-list a:hover{
	color:#900;
}

#my-list li{
	margin: 0 0 0 12px;
}
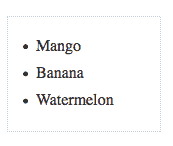
The HTML and CSS above generate a list that looks like this:

The custom-bullets sprite image
Ok so, what’s are CSS sprites, again?
In a few words, CSS sprites are basically images that contain a grid of images, like this one from Google. The idea is that instead of loading each image separately, you can load a master image that contains them all, and then use that master image as a background in all HTML elements that need it. This helps reduce the amount of HTTP requests your page makes on load, which then helps reduce loading times. A List Apart has a seminal article on CSS Sprites that, despite being old, will still blow your mind. Also, Christ Coyier from CSS-tricks.com has a cool article with more info on how to use sprites with an example from his own website. Read it.
Here’s the image very simple image sprite we’ll use for this example:

Getting it done:
Let’s further expand the CSS above to make this thing work:
- Remove the “bullets” from each li element
#my-list li{
	margin: 0 0 0 12px;
	list-style:none;
}
- Remove the left margin and some the same amount in padding. This helps both make up for the space lost when the bullets were removed and open some space between the border of the li element and the anchor element contained in it
#my-list li{
	list-style:none;
	padding: 0 0 0 12px;
}
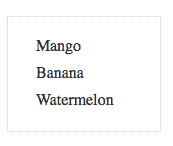
At this point, the list should look like this:

- Set the sprite as the background for the li element
#my-list li{
	list-style:none;
	padding: 0 0 0 12px;
	background: url(images/sprite.png) -8px 0px;
}
- Set the background for the :hover of the li element
#my-list li:hover{

background: url(images/sprite.png) -8px 24px
}
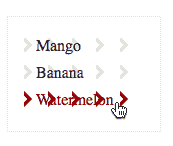
Notice that the list element is now using the sprite image as its background, but it repeats all over the place:

There are two ways to solve this, depending on how your sprite is set up:
- a) If your sprite is setup vertically (i.e. if all the images in the sprite are stacked in one column), you can do with just setting the background-repeat to repeat-y at it will do the trick:
#my-list li{
	list-style:none;
	padding: 0 0 0 12px;
	background: url(images/sprite.png) -8px 0px repeat-y;
}

#my-list li:hover{

	background: url(images/sprite.png) -8px 24px repeat-y
}
- b) If your sprite is setup horizontally (i.e. if all images in the sprite are distributed across the grid, next to each other, like the one in the Googlee example shown above), you may be better off by setting up background color for the most immediate element contained in the li element (in our case, the <a> element):
#my-list a{
	display:block;
	padding: 4px 0;
	color:#333;
	text-decoration:none;
	background-color:#FFF;
}
Whichever the case, your list should now look like this:

And that’s it! Click here to see the live example »
See you next time!